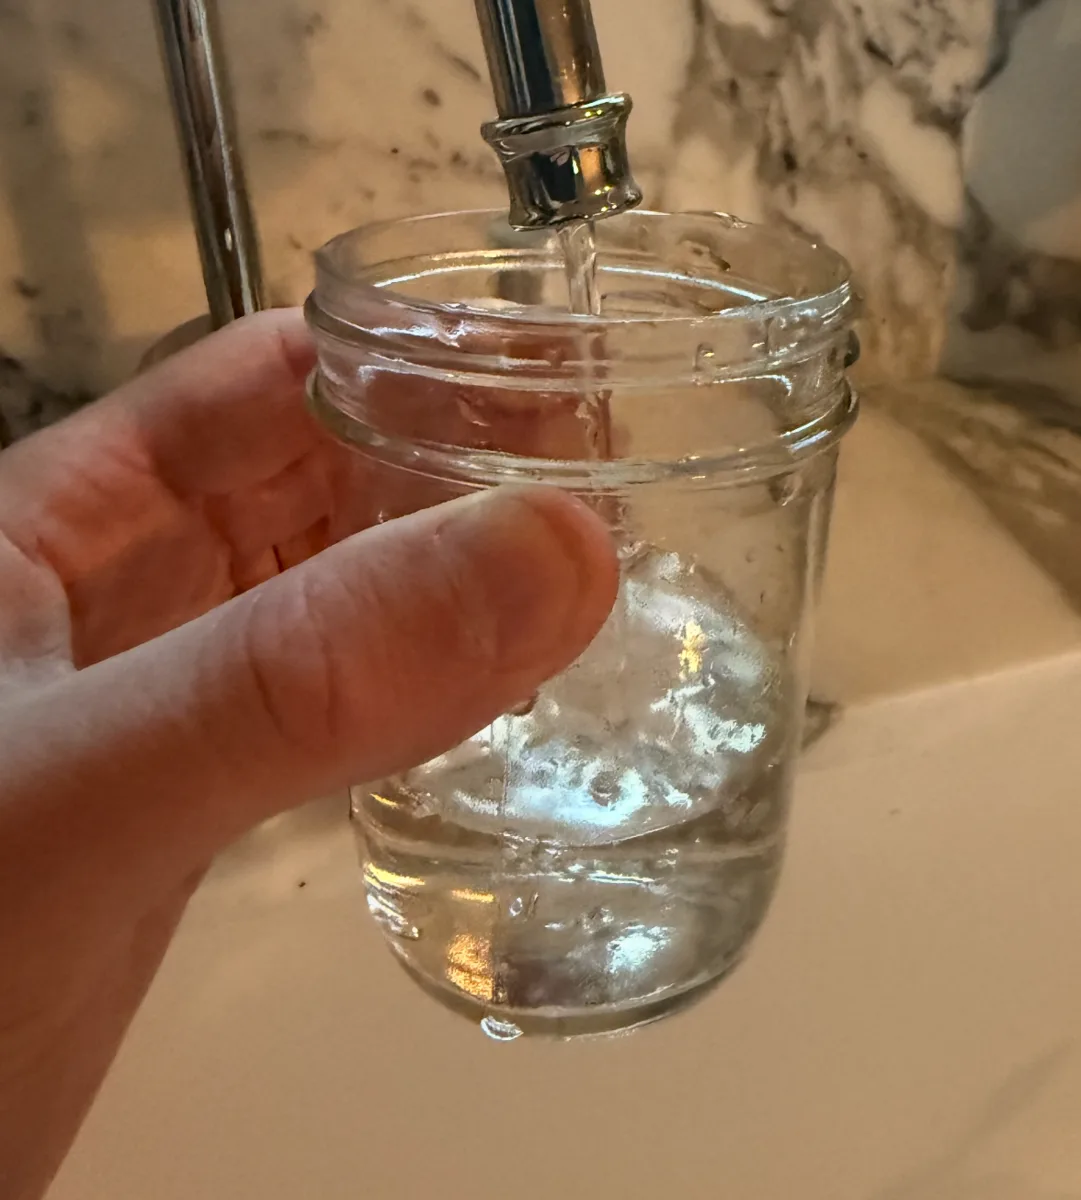
1.Collect water
Run your tap for 30 seconds, then collect about 100 mL (3.5 oz) of water in a clean glass.
Work on a clean counter and test one water source at a time.
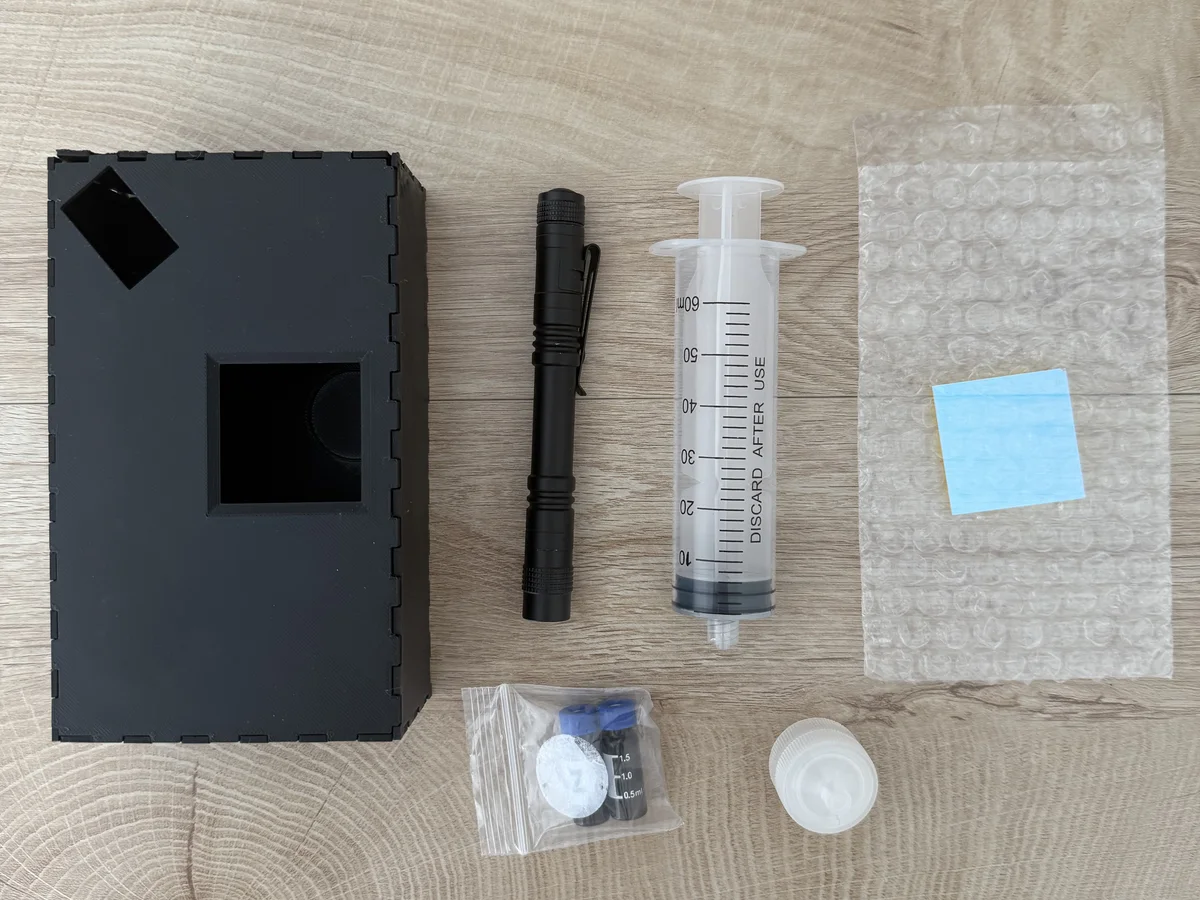
Vial 1 is hydrogen peroxide. Vial 2 is Nile Red dissolved in acetone (nail polish remover). Use them only in that order.
Follow the steps in order. After the second wait, filter the sample right away.
Run your tap for 30 seconds, then collect about 100 mL (3.5 oz) of water in a clean glass.
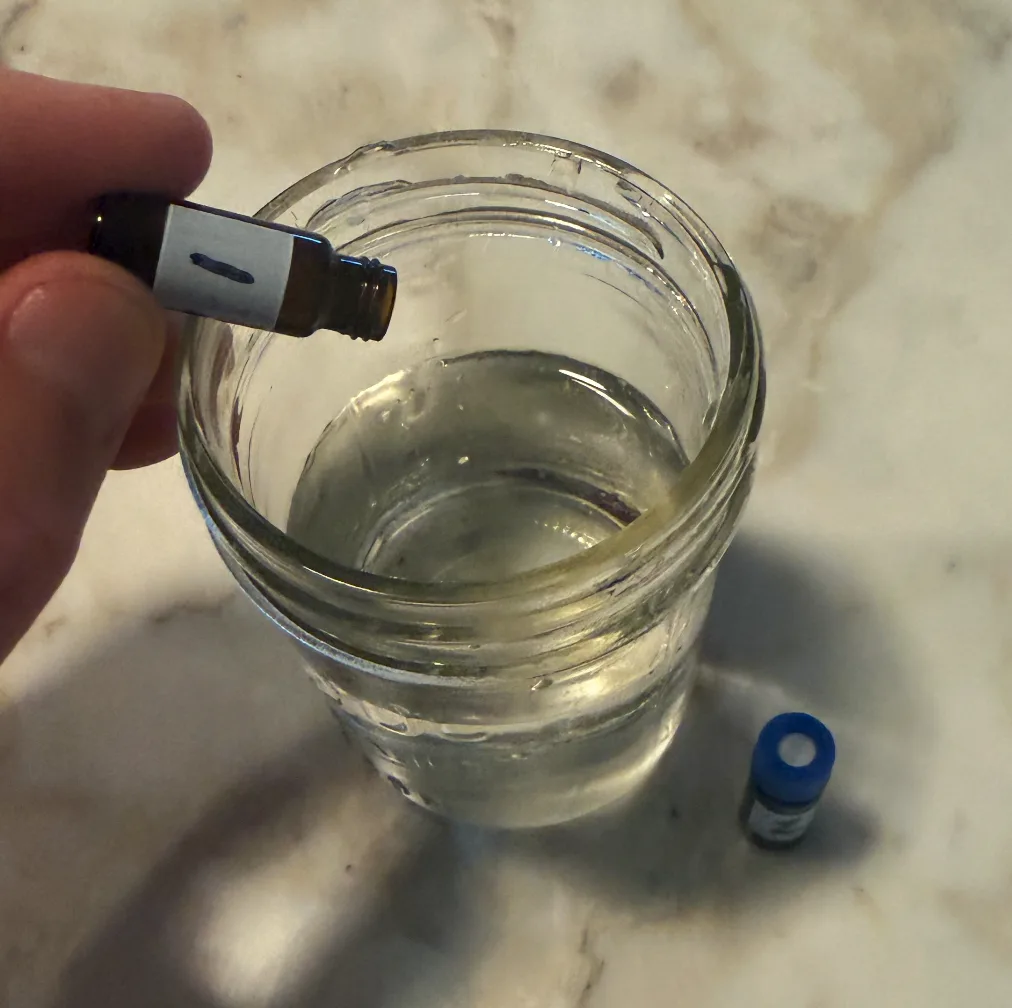
Add vial 1, gently swirl, and wait 30 minutes. Add vial 2, gently swirl again, then wait another 30 minutes.
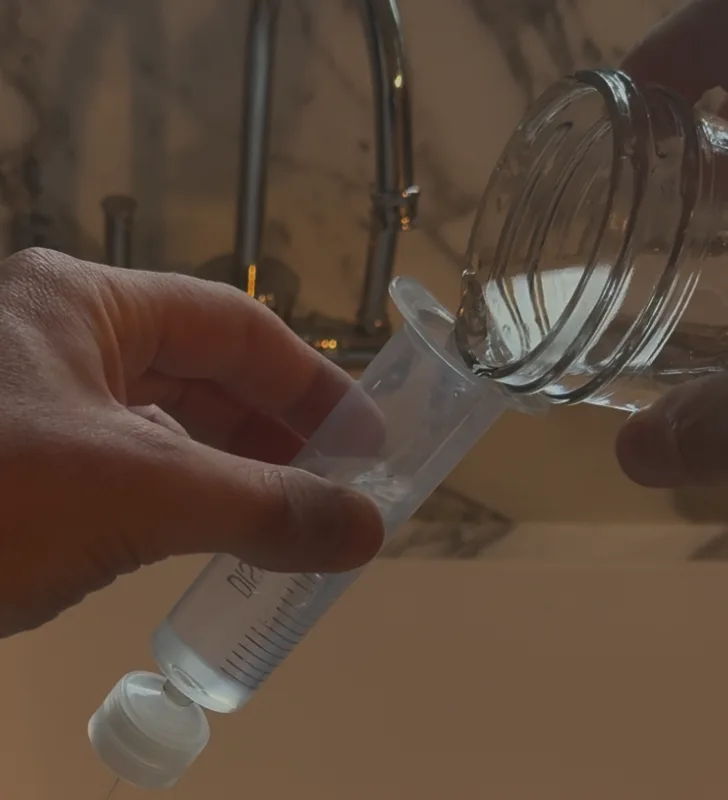
After the second 30-minute wait, draw the prepared water into the syringe and attach the filter holder. The syringe holds 60 mL, so you'll fill and push it about twice to get all 100 mL through. Move straight to filtering.
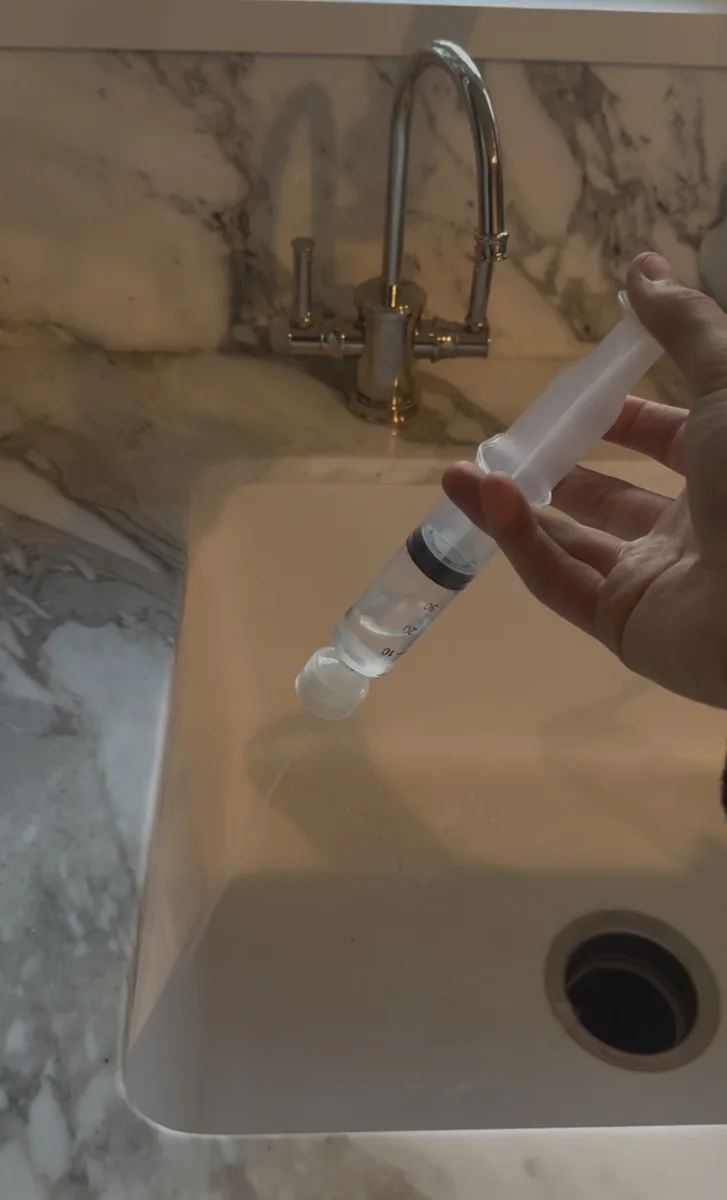
Once the prepared water is in the syringe, push it through the filter immediately. Do not let prepared water sit in the syringe.
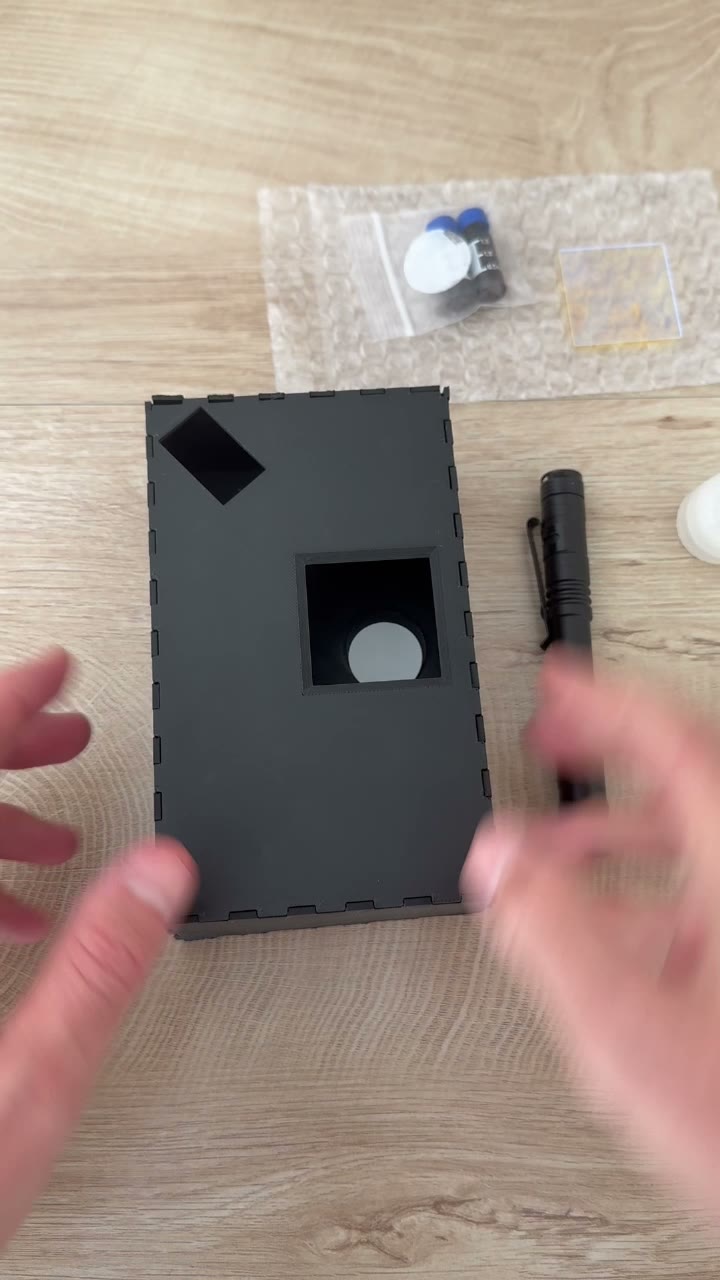
Your kit comes with a small piece of glass. Set the filter on the glass, then slide the glass into the opening on the imaging box.
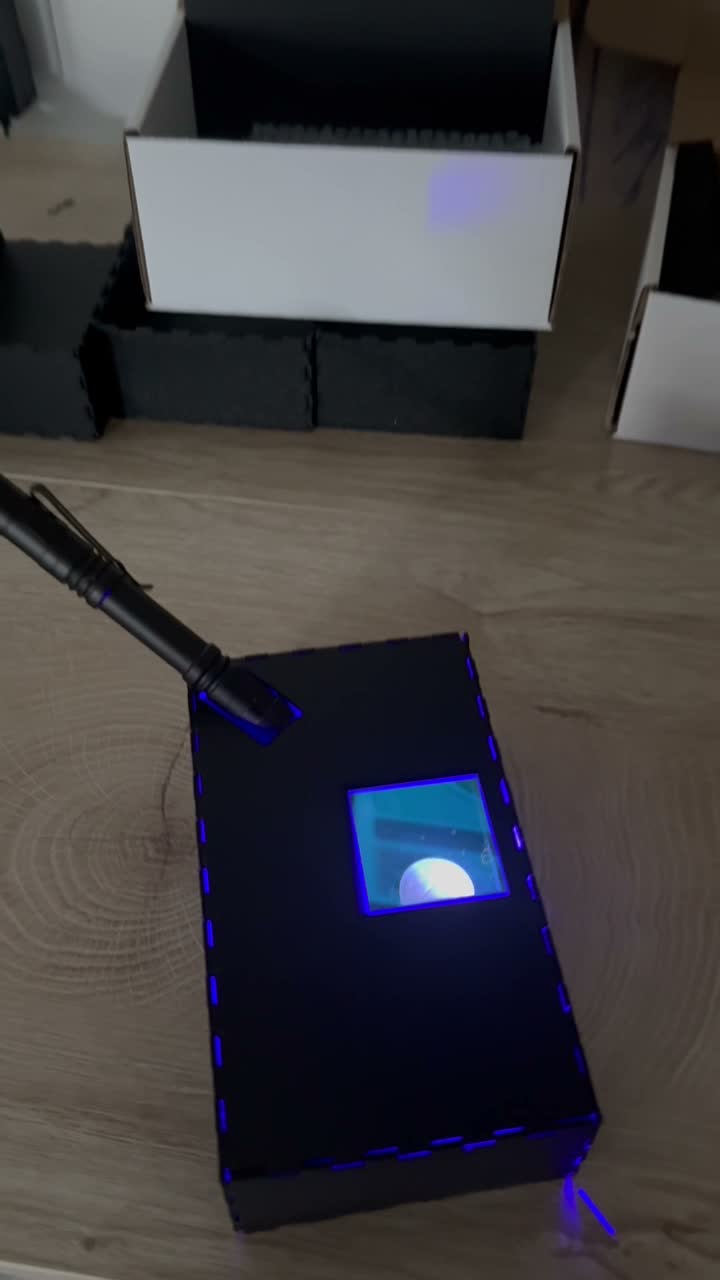
Place your phone lens over the top window as shown in the video below. The setup video shows how to line up the flashlight.
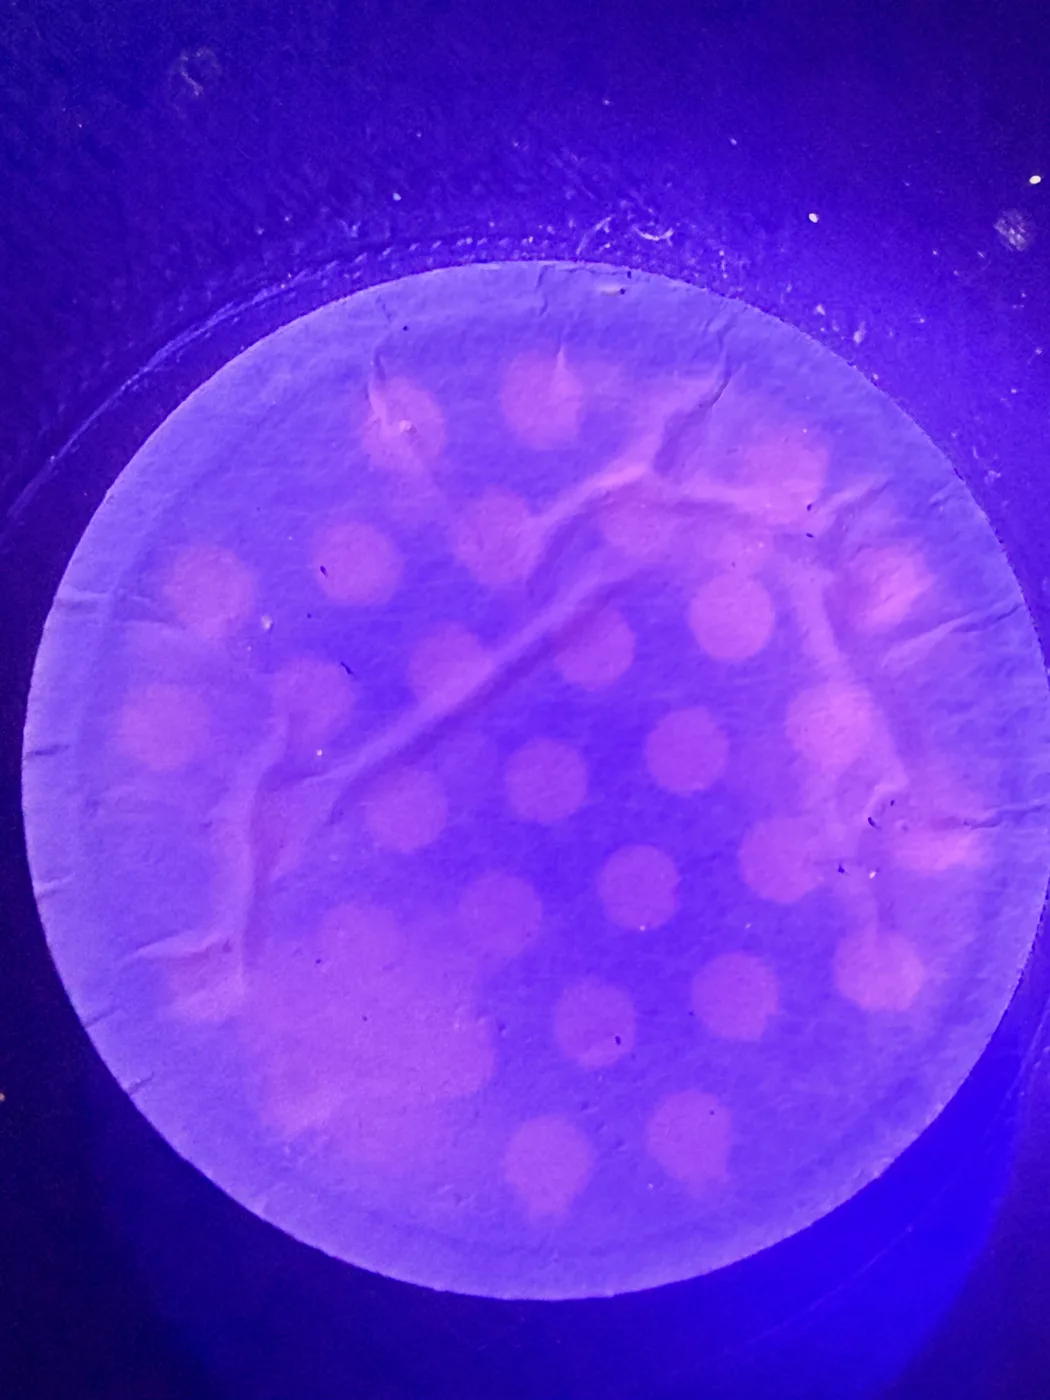
Take a clear photo of the glowing filter and upload it. We count the particles and add your result to the map.
The box blocks room light and lines up the filter, flashlight, and phone camera.
Once prepared water is in the syringe, push it through immediately. Do not let it sit in the syringe.
The pink glow is easiest to photograph when room lights are dim and the blue LED is close to the filter. The filter should glow for about 24 hours.
If your kit has two tests, run one on unfiltered tap water and one after your filter.
Make sure to put the dish or the glass cup in the dishwasher, or wash it thoroughly before drinking out of it again.
Questions? Use the chat widget in the bottom right corner. We are fast.